Wednesday, August 13, 2014

Winter warm-ups

It is the time of year that Aga owners feel particularly smug about their ridiculously extravagant purchase and are basking in the warm hue of their cosy kitchens.
 It has been a wickedly cold winter so  it is a relief to have one warm room in the house and not have to set the kitchen fire every morning.    We have lambs galore frolicking about the wet and muddy paddocks....they are doing really well this year, despite the cold, after the good start we had in the autumn.
Daffodils in the morning light
We have been on a steady diet of warming winter soups...
and burnt-bottomed brussels:
I even came across a recipe for parmesan broth and had to try it.  I read about this on Food 52, via the Huffington Post here and since I had a cupful of parmesan rinds in the fridge I gave it a go.  NEVER throw out your parmesan rinds.  They have so much flavour and can be added to soups and stews or keep them in a plastic bag in the fridge until you have enough for a broth.  It is great in minestrone or any soup really, and can be used instead of stock for risotto.   It also freezes well.
And because there is a lot of rocket in the garden I made rocket pesto:
I don't think there is any need for a specific recipe, but I toasted some cashews (say 1/3 cup), and threw them in the food processor with a couple of good handfuls of rocket (about 100g) and whizzed it up with olive oil, a splash of lemon juice, salt and pepper until it was the right consistency the flavour was balanced.  Parmesan is optional.  I have been adding it to soup, putting it on grainy bread under an egg or some avocado or smoked salmon and also made this delicious chicken:
This makes a quick and easy midweek meal and again is so simple it really doesn't need a recipe.
Just get some chicken pieces (I usually buy marylands and cut the drumsticks off) and gently push the pesto under the skin as far as you can.   Place on a baking dish and season with salt and pepper.  
Cut a lemon in half and add to the pan with a couple of unpeeled cloves of garlic.  Drizzle with olive oil and bake in a hot oven for approximately 30 minutes, turning half way, until nicely browned.
It was good with some celeriac mash and spinach from the garden.
This clematis is like a phoenix rising from the ashes.  I thought I had killed it last summer and now, in the middle of winter, it has raced up the pole and popped out a flower when I least expected it.  So pretty.

Monday, July 28, 2014

The joys of a quiet weekend

I've had to re-do this post, which started its life being about the holidays, which have now been and gone and seem like too long ago.  In brief we had a lovely but busy few weeks that included some home time..
Curious cattle watching on
No power one morning, breakfast by candlelight..
and some away time.  We went over to Perth and Margaret River for a few days, which was great fun but we could have done with a couple more days of being immersed in the best wine region in Australia (big call but we had some seriously amazing wine).  Highly recommended....
Gratuitous Aga shot
We came back to Victoria to some rather chillier weather:
At long last we are having a proper winter.  Snow has been falling on the mountains, we've had rain and storms and, on Wednesday morning, our first frost: 
This past weekend has been blissfully not busy.  A yoga class, lots of gardening, planting trees, cooking and a few glasses of red by the fire.  I have finally pruned all the roses
which is a good job to have out of the way.  I have refilled the veggie beds with some lovely mushroom compost,
and dug up these potatoes that I didn't know were there:
I planted out some oaks that I had grown from acorns (bit like sending your first child off to school....)

and knocked up some yoyos for Tim to give to a family friend whose wife died recently...
I made a hearty lamb chop casserole
and picked this beautiful cabbage
which I pan fried with bacon and onion:
The rhubarb is flourishing at the moment so I made a little pudding:
This is so easy and I think better than traditional crumble as it has more crunch.  You can make the very simple crumble ahead and it keeps for ages in the freezer, then when you have some poached or roasted fruit you can sprinkle it over the top.    

DECONSTRUCTED RHUBARB CRUMBLE  Serves 4

1 bunch rhubarb (about 5 stems), trimmed and cut into 5 cm pieces
50g butter
2 tblsp brown sugar
1/2 cup verjuice
a vanilla bean

Crumble mix:
1/2 cup white sugar
1/2 cup brown sugar
1/2 teasp nutmeg
1/2 teasp cinnamon
3/4 cup flour
125g butter

For the crumble mix:
Preheat oven to 180c.
Put all the ingredients into the food processor and pulse to chunky breadcrumbs.
Spread onto a large lined baking tray and cook for approximately 10 minutes until it begins to colour around the edges.  Take it out and give it a good mix around, then put it back for another 10 or so minutes.  Keep an eye on it as you don't want it to burn.  Do this until it has coloured evenly.  Mix it so it forms to crumble, cool on the tray and store in a container in the fridge or freezer.

For the rhubarb:.
Preheat the oven to 180c
In a frying pan that can go in the oven melt the butter and add the sugar and verjuice.  Mix well.  Scrape the seeds out of the vanilla bean and add to the pan, adding the bean as well.
Add the rhubarb and stir well.
Cover with foil or a lid and bake for 15 minutes.  Remove the cover and cook for  a further 15-20 minutes until the rhubarb is soft and the sauce has caramelised.
Serve the rhubarb with the crumble sprinkled over the top and cream or custard on the side.
This would also work well with pears.  And probably apples or quinces.


Friday, June 20, 2014

Queen's Birthday weekend

The Queen's Birthday weekend in June is one of my favourite weekends of the year.  We have friends to stay, the kids come home, we eat, we drink, we walk.  We have a big dinner party on Saturday night, go to a friend's paddock picnic on Sunday and curl up by the fire on Sunday night, eat more, drink more and watch Masterchef with some commentary from Matt.  I like the tradition of it.  Do you think that if we ever became a Republic that they would abolish it??  I bloody hope not.

We lit a massive bonfire..
Sadly I didn't photograph much of the food I cooked for the weekend, it was just too busy.  Matt did make his best brew yet of mulled wine, but I'm not sure that I can reveal the secret ingredient.  I made a great pudding though, for Saturday night, which was a croissant bread and butter pudding with blueberry sauce and baked pears.  I will give you the recipe for the pudding another day, but here are the baked pears:
 We recently had a visit from a Scottish friend who had been in Tasmania and bought me a jar of the most beautiful honey I think I have ever tasted..
The honey is from the Leatherwood tree which is common in Tasmania, and the trees generally don't start flowering until they are 75 years old.  It has a delicate floral flavour which is the Australian bush in a jar, and I thought would work well with the pears.

BAKED PEARS   Serves 6

6 pears, peeled, cored and halved.  Keep the stems on
1/4 cup castor sugar
1 vanilla bean, split
1/4 cup honey, Tasmanian leatherwood if you can get it
Juice of a lemon
50g butter
cinnamon

Preheat the oven to 180c.
Put the pears into a baking dish.
Measure the sugar and mix in  the seeds from the vanilla bean then sprinkle over the pears.
Drizzle over the honey (soften in the microwave to make it more runny) and lemon juice.  Put the lemon halves in the pan too.  Dot the butter over the top.
Add 1/4 cup water and sprinkle with cinnamon.
Cook for 30 minutes, then turn them over and give them a baste, and return to the oven for approximately 30 more minutes until the pears are tender and slightly translucent.
Very easy.  These pears would make a lovely pudding on their own with some fresh cream or ice cream or alongside a lemon cake, they would even be wonderful on porridge. 

I know that a Republic for Australia is inevitable and probably necessary.  But in the meantime, long live the Queen and her birthday!
Getty images


Thursday, June 12, 2014

Bringing home the bacon

It's been a long time between drinks, sorry about that.  There's been lots of action in the kitchen though so it's definitely time for an update.  We have sailed through the most beautiful autumn, which was almost like an Indian Summer:  long, calm (often very warm) days, soft rainfall which came at the right time, mild nights and day after day of sunshine.  For farmers this is GOOD.  The mild weather means that crops germinate well and pasture feed is jumping out of the ground.  Needless to say it was far to nice to be sitting inside looking at a screen.
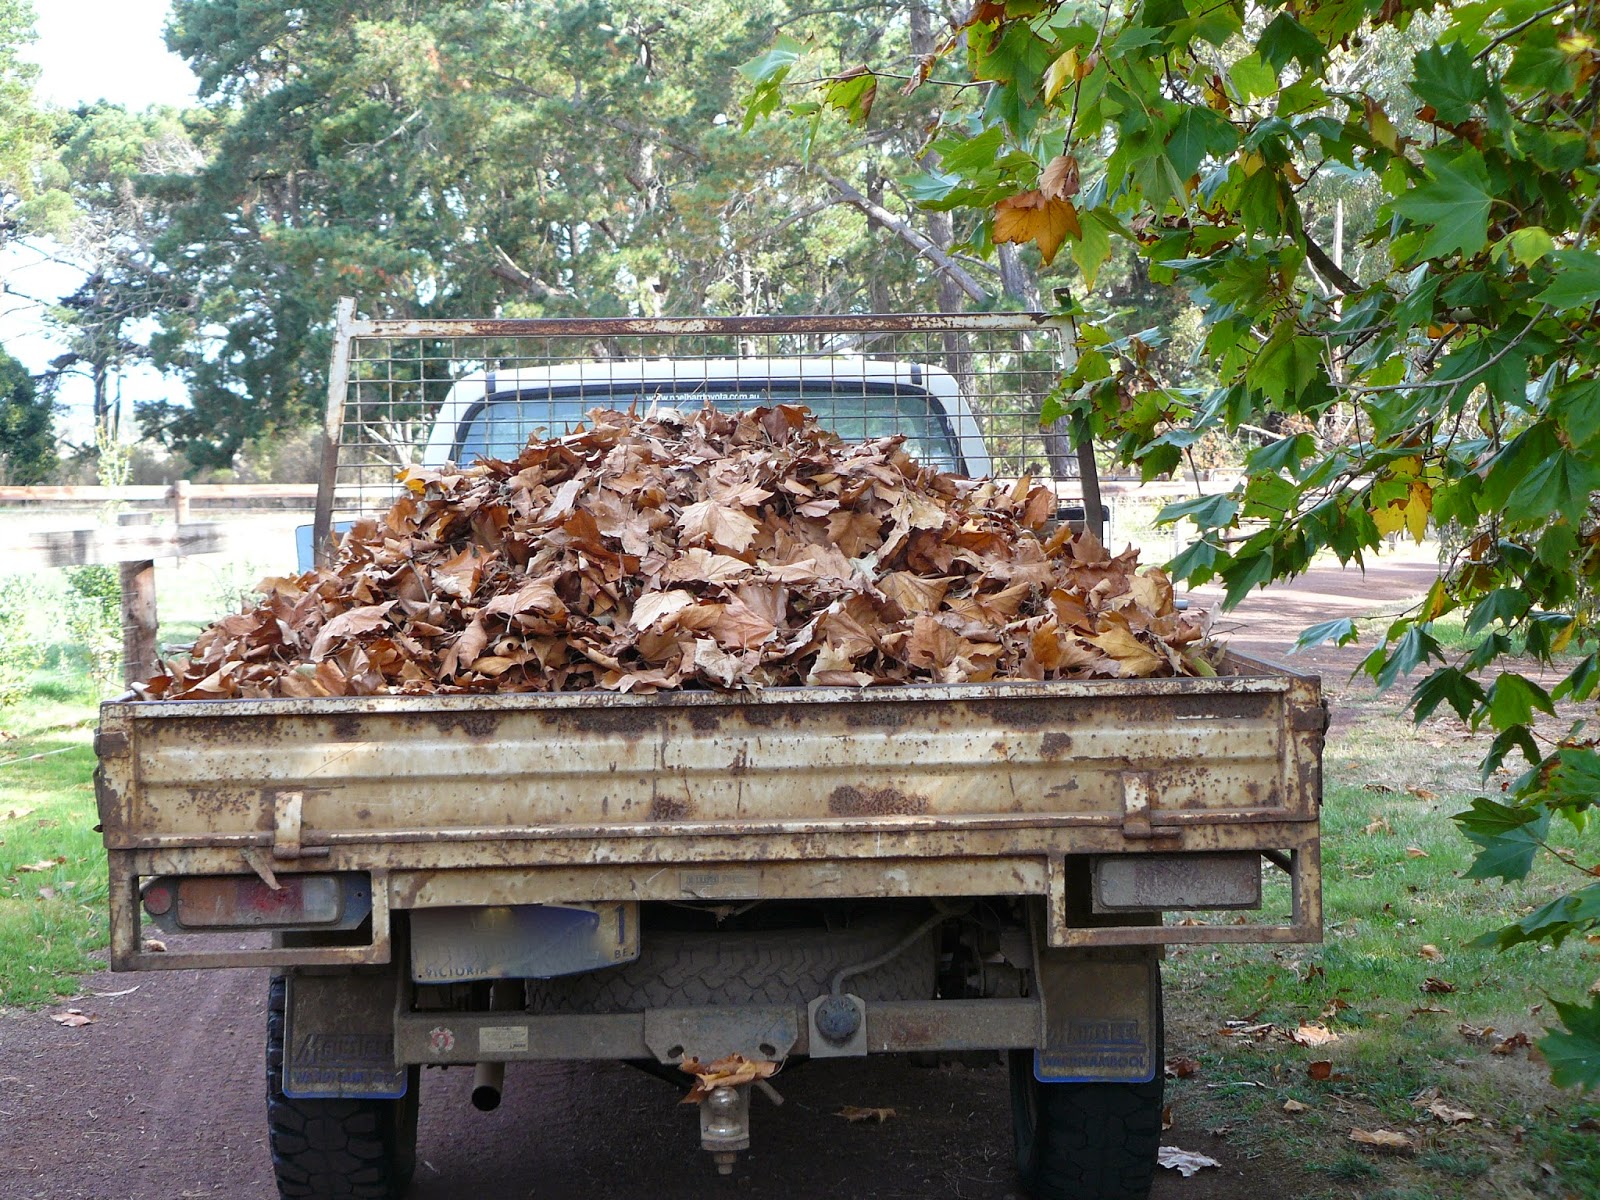
Autumn is a season of such abundance in the garden that it keeps me very busy; not only with produce, but cutting back and raking, raking, raking.  The leaves just keep on coming...
 Now that winter is upon us there is a chance to catch up inside and enjoy the shorter days, roaring fires, woollen jumpers and slipping into the old uggies.  I have been making stock,
and marmalade,
and turned this brace and a half of wild duck into a sensational pie (I'll give you the recipe one day if you're good)..
But the real highlight of the last month is that I have been home-curing my own bacon....yes, BACON.  It was an experiment which may need a little tweaking, but I think it was a worthwhile exercise.  You might well be thinking, why would you bother?  Well, two things really.  The bacon that you buy in the supermarkets in Australia is very ordinary.  It is pumped up with water, cured all sorts of chemicals and is only pink because it has so many nitrates added to it.  Secondly it tasted about a zillion times better when you cure your own.

After some judicious googling I learnt that without nitrates the cured pork would go grey, which will not affect the flavour, but would not look like bacon should.  I also learned that celery juice contains naturally occurring nitrates and can be used to help hold the colour.  I bought a free range Otway Pork belly from the butcher.  He boned it except for one bone that he said would hold it all together and which I then removed at the end.
I then made the cure.  
Juice the celery...
I opted for a dry cure so I didn't add much celery juice.  Next time I might try a wet cure so I can use more juice.  I used the following mix:
1/2 cup celery juice
1/2 cup salt (I used David's Kosher Salt)
1/4 cup brown sugar
2 tblsp juniper berries
1 tblsp black peppercorns
1 teasp mustard seeds
4 cloves garlic
several sprigs of thyme and lemon thyme, picked
Whizz all this with a hand mixer (the juniper berries kept popping out of the pestle and mortar)
then apply a thick coating to both sides of the pork:
Refrigerate for seven days, after which time it will look like this.
Rinse off the salt, pat dry with kitchen paper and cook in a 100c oven for two hours.  At this point you can smoke it if you are that way inclined.  Cool, trim any bone out then place in the fridge to firm up before slicing:
You can freeze it too, but it may lose a little colour. So give it a go, you won't look back.   Here is a little morsel..
The excellent news is that I fed it to everyone last weekend and so far no-one has died of botulism.
I am also busy working on an new version of my blog.  Will keep you posted.